Want the shiplap look for less? Learn how to make shiplap boards – the EASY way! In this post I share our step by step DIY shiplap tutorial, including how to make shiplap boards and how to install shiplap. We installed a plywood shiplap ceiling for our One Room Challenge renovation in our laundry room and master closet – I’m so excited with how this space is turning out!!
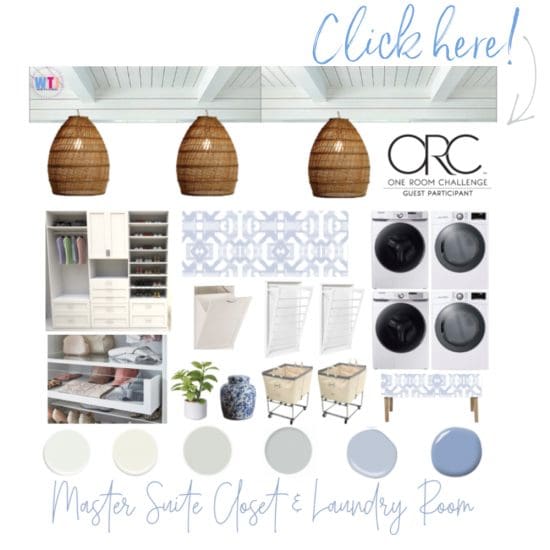
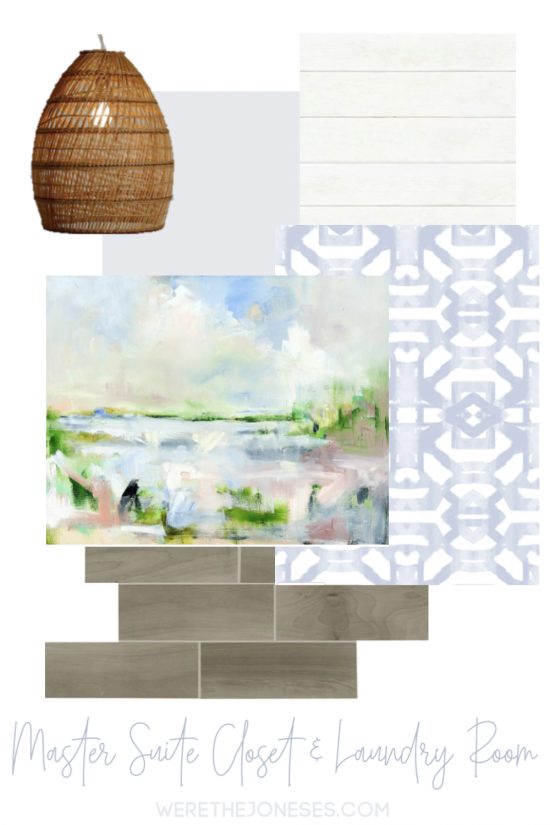
Did you catch our weekly One Room Challenge updates for the Master Closet & Laundry Room?

One Room Challenge – Week Three
One Room Challenge – Week Four
DIY Shiplap Tutorial - The Easy Way!
*UPDATE* Take a look at our finished Master Suite Closet & Laundry Room HERE!

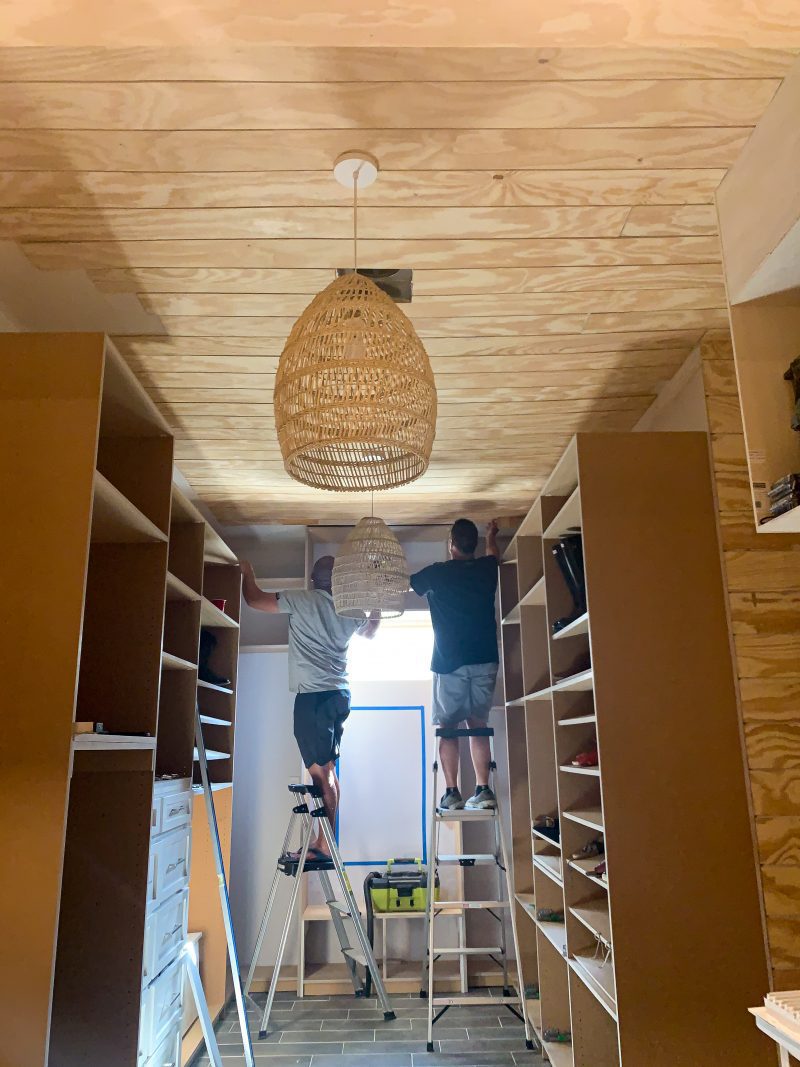
It’s week 6 of the One Room Challenge! It’s been a long road to get to where we are, but we are getting so close to the finish line!
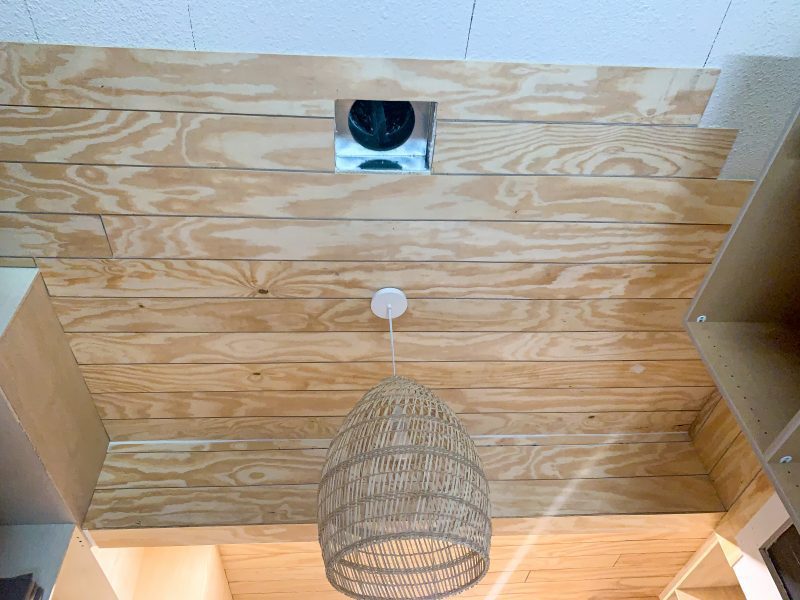
Adding shiplap to the ceiling and walls in this room did not come easy…I had to convince Bryan to install shiplap on the ceiling for this massive laundry + closet space. He was hesitant at first, but I’m so glad we went through with it!!
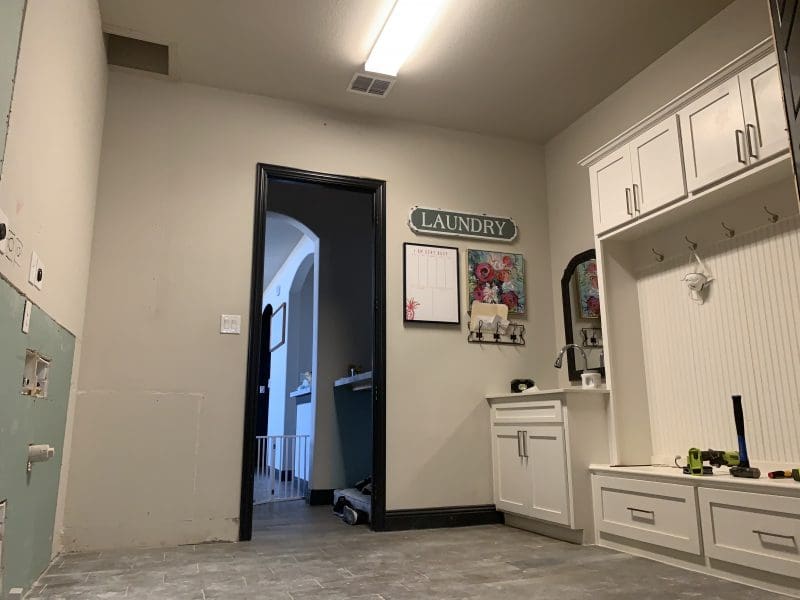
Here’s a refresher of what the room looked like at the beginning of renovations:

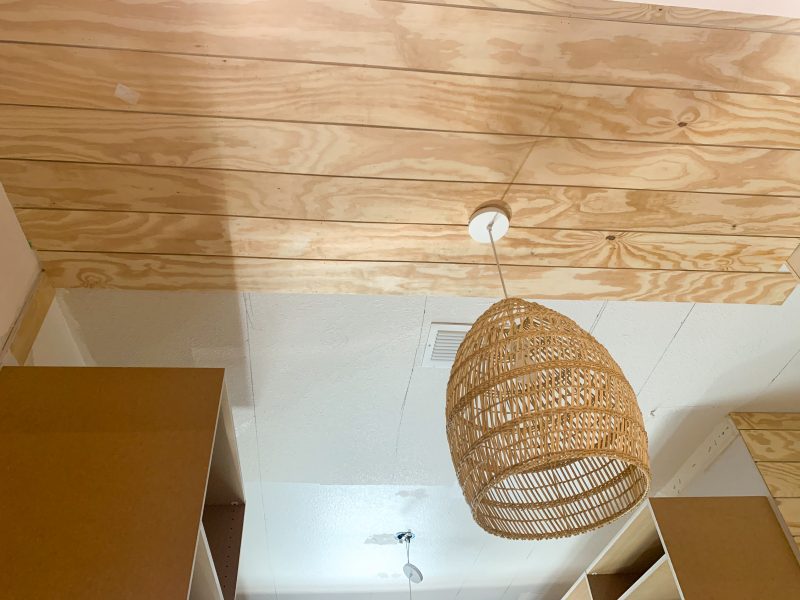
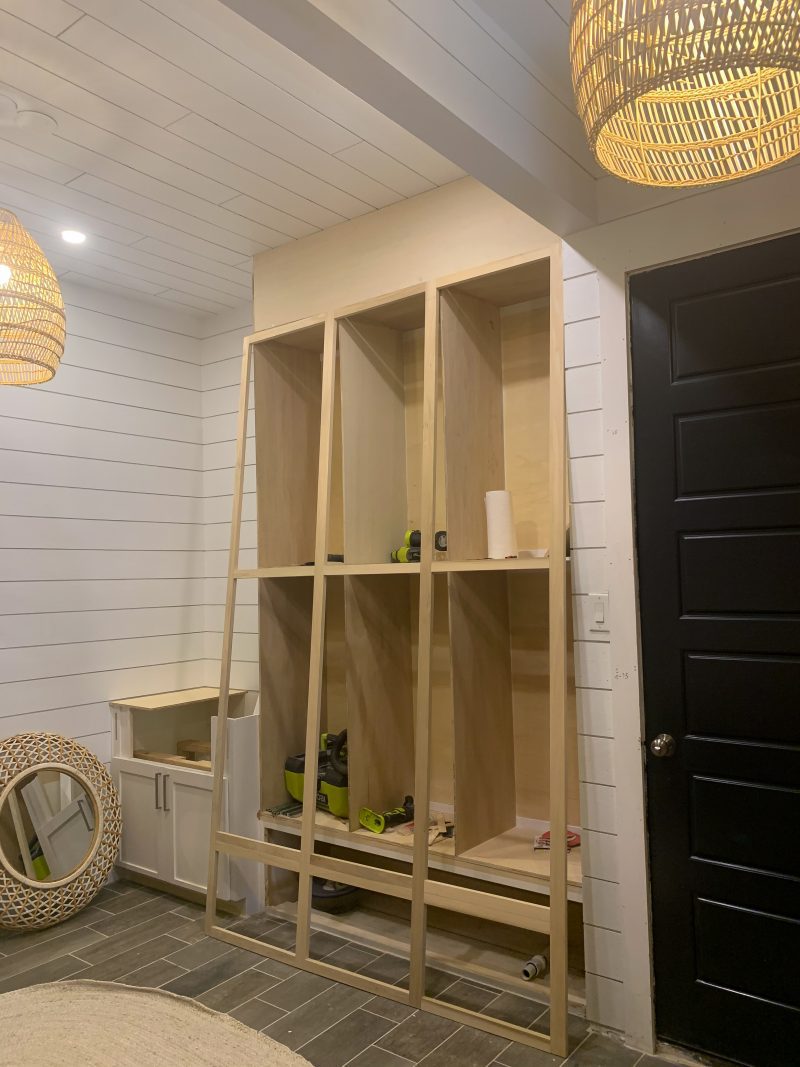
HERE IS WHAT THE ROOM LOOKS LIKE NOW:
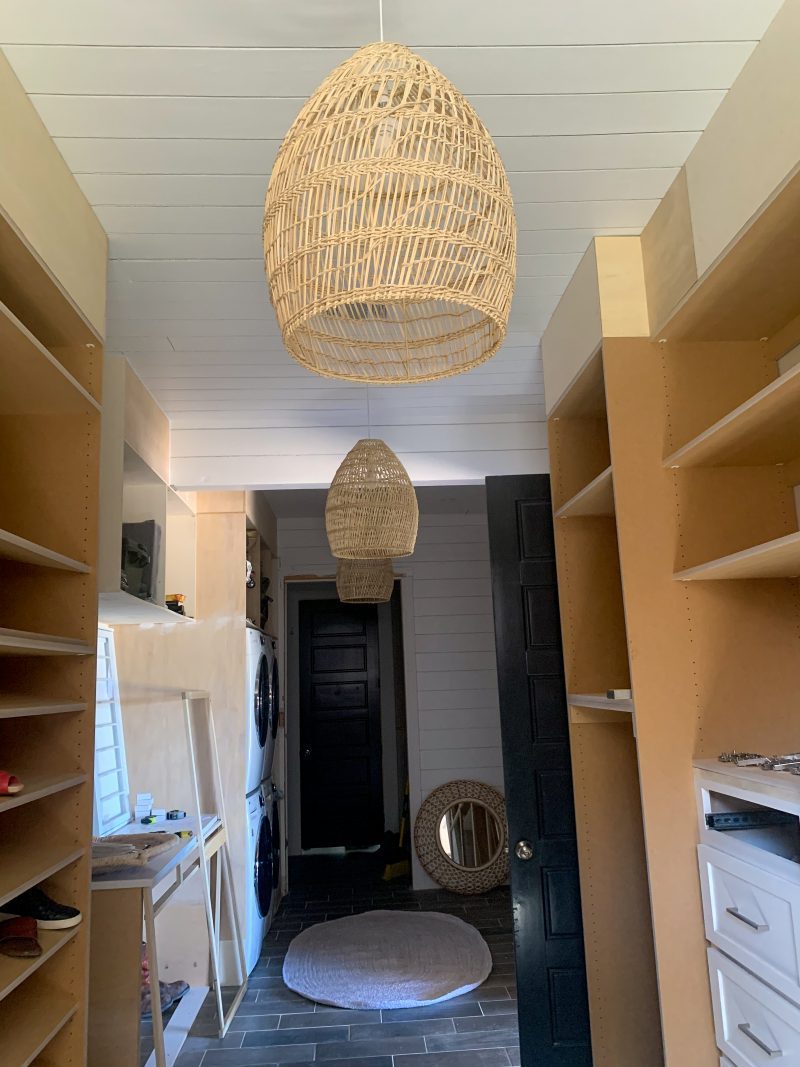
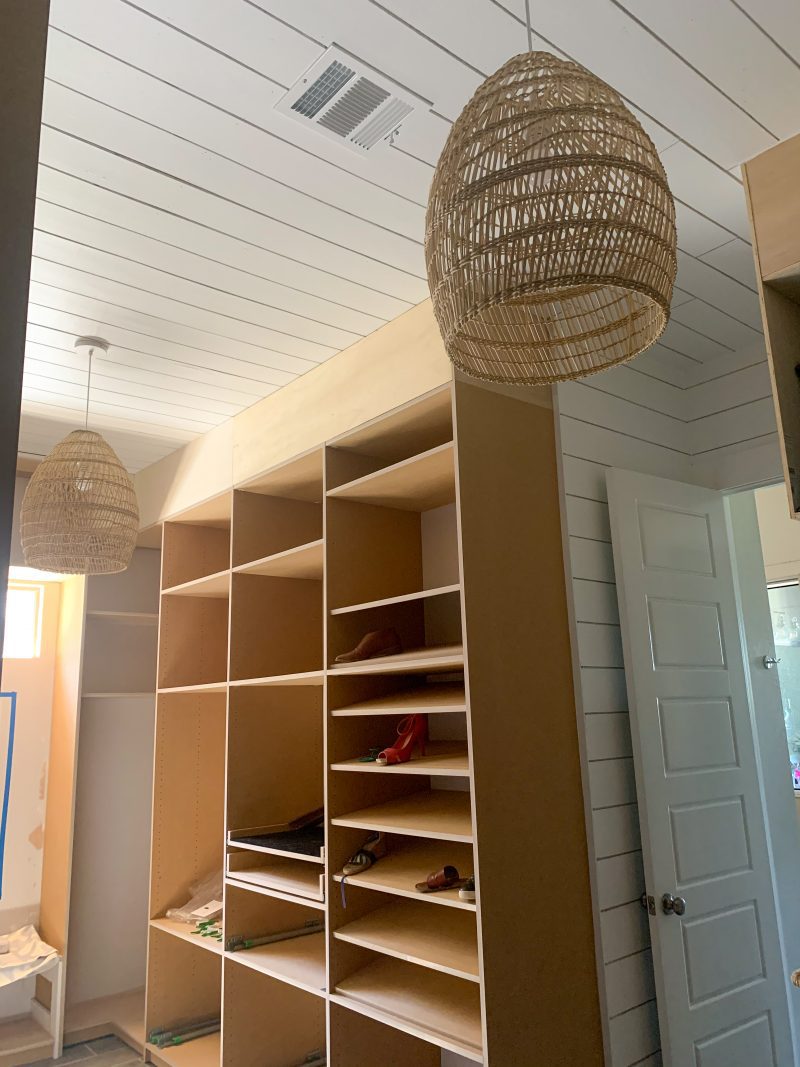
The shiplap really does something to the room, doesn’t it?? It adds a coastal feel and warm texture to this big space. I feel like it helps the two rooms really flow together.
We still have a ways to go, but we’re so happy to have the shiplap installed, painted and complete! Every box we can check off as complete is a big step in this renovation project.
We’ve installed faux shiplap in several other spaces in our home, and for our shiplap projects we do the easy & budget friendly way to shiplap: with plywood shiplap boards!
In this DIY shiplap tutorial, I will walk you through how we install shiplap in our home that doesn’t cost a fortune, and that is an easy DIY you can do at home too. We used plywood but lumber yards Colorado are also a good alternative.
How Do You Make Shiplap Out of Plywood?
DIY Faux Shiplap Ceiling
After you gather all of your materials and tools, the first step you will need to do is strip your plywood sheets to the desired width you want your shiplap boards. We do 5 7/8 inch width on most of our plywood shiplap projects to have minimal waste.
You will set your table saw to the desired width (5 7/8) and run each of your plywood sheets through the table saw. We used 9 sheets of plywood for our shiplap ceiling, so we ended up with 72 pieces of 5 7/8 inch x 96 inch shiplap boards.
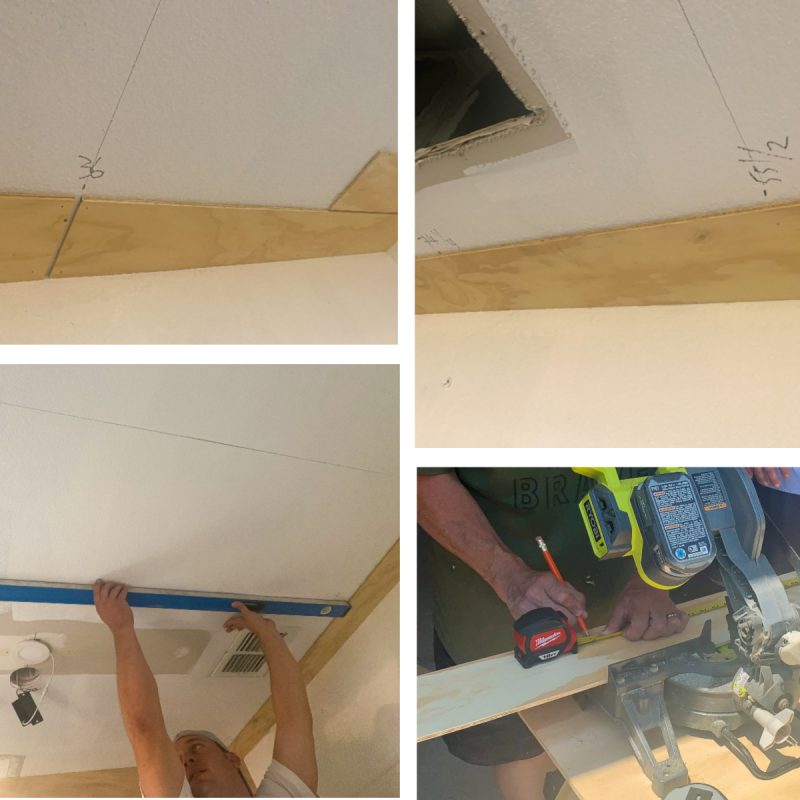
You will need to determine which direction your studs run on your ceiling. You will hang your shiplap boards perpendicular to the studs. Measure the distance from wall to wall. If longer than 96 inches, you can determine a staggering pattern to follow. If 96 inches or shorter, you can use the entire length of the shiplap board.
Using a stud finder, level and pencil, find your studs in the ceiling and mark vertical lines down your wall where the studs are. This is VERY important! If you don’t nail the shiplap boards to the studs the boards will be way and inconsistent, and can even pop off.
How to Install Shiplap
Starting in the top corner of the ceiling, nail in your first board. Make sure it is tuck in tight to the wall. It is WAY easier if you have two people hanging the boards, one person on either end of the board. Using a nail gun, nail the shiplap boards into each joist with two or more nails.
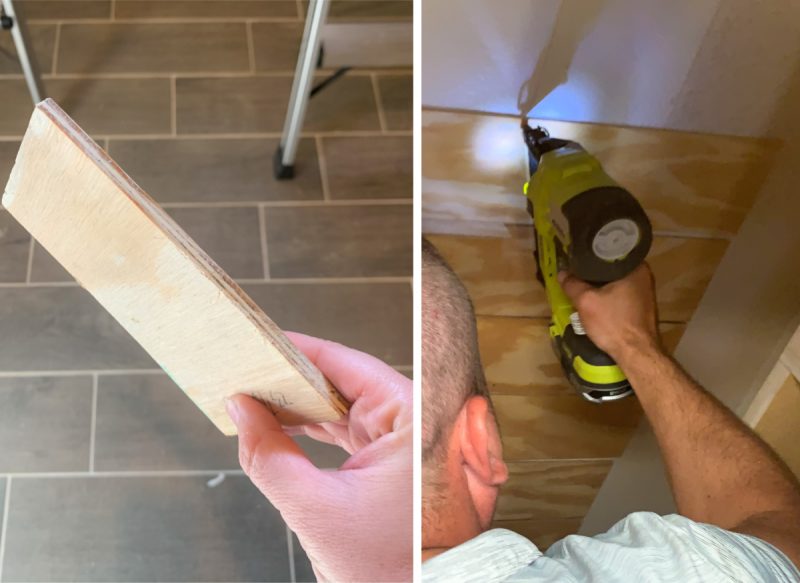
After you finish your first shiplap board, you will make a gap before you nail in your next board. The easiest way to create a gap is to cut a piece of 1/4 scrap plywood. Have one person hold the 1/4 inch scrap plywood piece in your gaping while the other person nails the board in the ceiling.
Once you have your boards about halfway down your ceiling or wall, measure the length of the wall you have left, and you can adjust the gaping of the boards to make sure you stay reasonably square. You will likely have to cut the last shiplap board piece with a table saw so it will fit properly.
After all of your boards are nailed to the ceiling, you will caulk around the 4 edges of shiplap to the perimeter of the walls.
Shiplap on a Budget
Next step is paint!
If you are painting the shiplap yourself, I recommend using a paint sprayer. You can purchase one if you do a lot of big paint projects or you can rent one from a hardware store instead. We used two coats of primer and two coats of paint.

DIY Shiplap Tutorial - The Easy Way!
Want the shiplap look for less? Learn how to make shiplap boards - the EASY way! In this step by step DIY shiplap tutorial I show how to make shiplap boards out of plywood, and how to install shiplap on the ceiling.
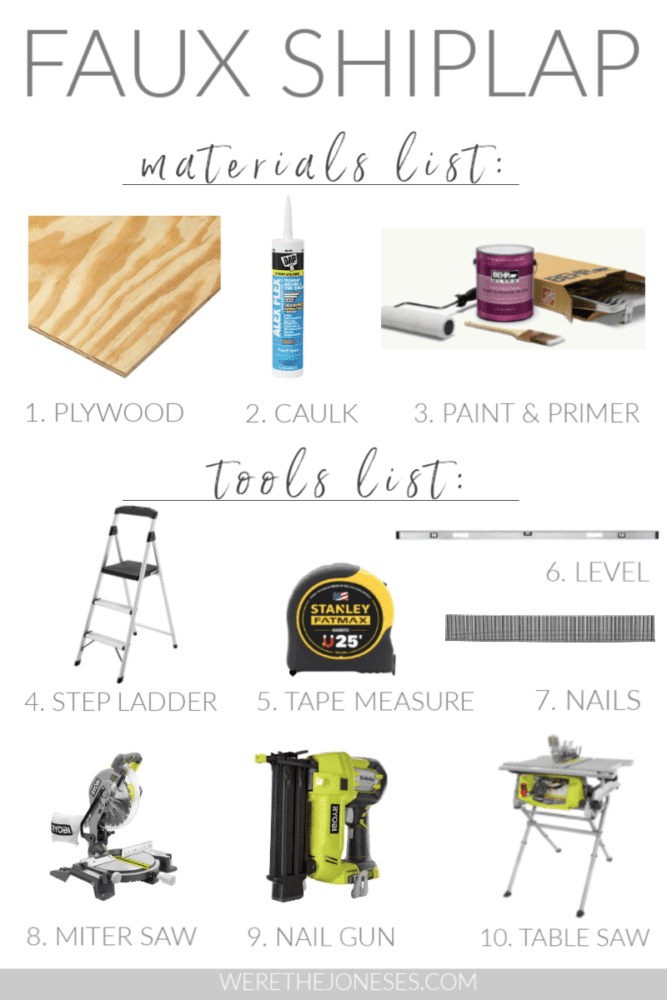
Materials
Tools
- 18-Volt ONE+ Cordless AirStrike 18-Gauge Brad Nailer
- 15 Amp 10 in. Table Saw with Folding Stand
- 10 in. Compound Miter Saw with LED
- 3-Step Lightweight Ladder
- 72 in. Aluminum I-Beam Level
- 25 ft. FATMAX Magnetic Tape Measure
- Oversized Carpenter Pencil
- Stud Finder
PAINT
Instructions
- Set table saw fence to desired width of your shiplap boards. We do 5 7/8 inch width on most all our shiplap projects to have minimal waste.
- Run plywood sheets through table saw over and over until you use all 9 sheets - you will end up with 72 pieces of 5 7/8 inch x 96 inch shiplap boards
- Determine which direction your ceiling joist run, and your shiplap boards must be perpendicular to the joist. Measure the distance from wall to wall. If longer than 8 feet, you can determine a staggering pattern to follow, and you also must end your shiplap boards at a ceiling joist so that the end of each board is secure. If 8 feet or shorter, you can use entire length of board.
- Using a stud finder and level and pencil, find your studs in the ceiling and mark lines with pencil(or wall if doing wall) THIS IS VERY IMPORTANT! If you don’t nail to studs the shiplap boards will be wavy and inconsistent.
- Cut your boards to the desired length with a miter saw.
- Starting in the top corner, nail in your first board (tuck it in tight!) This is WAY easier if two people are working together, one person holding each in of board. Nail shiplap into each joist with 2 or more nails.
- Once you have your first shiplap board in, you will create a gap before you nail in your next board. The easiest way to do this is to take a piece of 1/4 inch scrap plywood. Have one person hold the 1/4 inch scrap plywood in your gap while the other person nails the board in.
- Once you have your boards about halfway down your ceiling or wall, measure the length of the wall you have left, and you can adjust the gaping of the boards to make sure you stay reasonably square. You will likely have to cut the last shiplap board piece with a table saw so it will fit properly.
- After all of your boards are on the ceiling, you will caulk around the 4 edges of shiplap to the perimeter of the walls.
- Next step is paint! If you are painting the shiplap yourself, I recommend using a paint sprayer. You can purchase one if you do a lot of big paint projects or you can rent one instead. On our ceiling, we did 2 coats of primer and 2 coats of paint.
Notes
Helpful Tips, Tricks, and Suggestions:
- If you don't have a miter saw or table saw, you can use a circular saw with a KREG saw guide instead.
- There is a smooth sanded side of the plywood, and a rough side of the plywood. Make sure the sanded side is exposed for a smoother finish and easier painting.
- After nailing in all of your shiplap boards, most people will cover the nail holes with wood putty or caulk. We skip this step! It's personal preference, if you want nail holes to be covered for a more clean look.
- Make sure you read the manuals and follow all of the safety guidelines for each of the tools you are using for this project.
I hope this is a helpful guide on how to install shiplap on a budget. By using plywood boards to make faux shiplap boards, you can get the shiplap look for a lot less!
Let me know if you have any questions on installing shiplap in the comments, and I’ll be updating this post to include our finished room once the One Room Challenge is complete!

I’m excited to see everyone’s updates this week – make sure you check out all the featured designers and guest participants. There’s so many creative room makeovers happening!
Thanks for stopping by!